

Most people picture invention as a single flash of brilliance. Someone takes a shower, an idea strikes, and weeks later a product hits shelves. That story is almost entirely fiction. The real invention development stages explained through practice and research reveal a disciplined, iterative process with distinct phases, decision points, and plenty of failure in between. Understanding these stages does not just satisfy curiosity. It gives you a concrete framework to move your own idea from a vague concept to something real, protected, and marketable.
Table of Contents
- Key takeaways
- Invention development stages explained
- Stage 1: Problem definition and opportunity recognition
- Stage 2: Ideation and exploring multiple solution options
- Stage 3: Evaluation, selection, and early documentation
- Stage 4: Prototyping, testing, and iterative refinement
- Stage 5: Final refinement, scaling, and market launch preparation
- My honest take on the invention process
- How Inventifystudios can move you forward
- FAQ
Key takeaways
| Point | Details |
|---|---|
| Invention is a process | Successful inventions follow repeatable stages, not random inspiration. |
| Problem first, solution second | Defining the real problem before brainstorming solutions leads to stronger inventions. |
| Ideation requires volume | Generating at least 4 to 6 distinct ideas produces significantly better outcomes than committing to your first concept. |
| Document early and often | Dated sketches and notes establish legal priority and support patent applications. |
| Prototypes should start cheap | Early models are for learning, not perfection. Build fast, test fast, adjust fast. |
Invention development stages explained
The innovation process is best understood as a loop, not a straight line. You define a problem, explore solutions, build something, test it, and refine it. Then you loop back. Real invention involves cycling between these phases repeatedly rather than progressing through them once and moving on. Knowing where you are in that loop at any given moment is what separates inventors who ship products from inventors who collect notebooks full of ideas that never move forward.
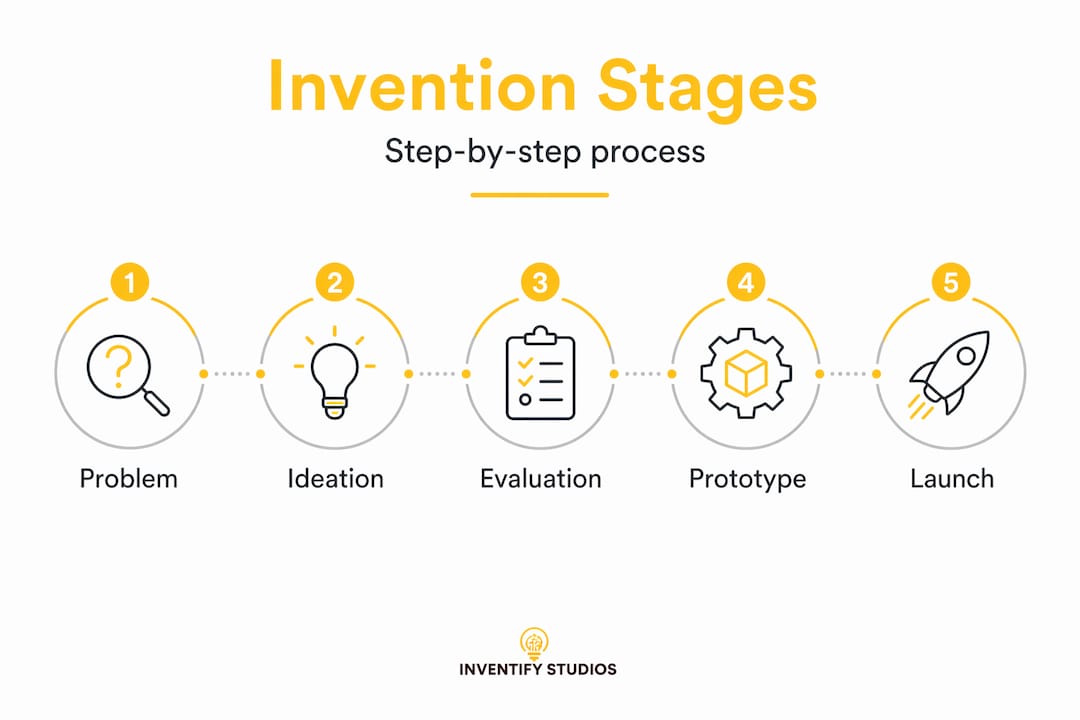
There are five core stages to this process. Each one has a distinct purpose, common pitfalls, and tools that make it more effective.
Stage 1: Problem definition and opportunity recognition
Every successful invention solves a problem someone actually has. That sounds obvious, but the majority of first-time inventors skip this stage entirely and jump straight to their solution. The result is a product that technically works but that nobody wants to buy.
Deep problem definition means going further than "people need a better mousetrap." It means understanding who specifically has the problem, how often they experience it, what they currently do about it, and why current solutions fall short. The difference between a solution-first mindset and a problem-first mindset is not small. A solution-first inventor builds what they think is cool. A problem-first inventor builds what people will actually pay for.
Here is how to approach this stage with discipline:
- Talk to real people. Interview at least ten potential users before you sketch a single design. Ask about frustrations, workarounds, and costs they accept.
- Map the failure points. List every way current solutions fall short. Those gaps are your opportunity.
- Quantify the pain. Is this a minor inconvenience or a costly recurring problem? The bigger the pain, the bigger the market.
- Check for timing. Some problems only become worth solving when technology catches up. Ask why nobody has solved this yet.
Pro Tip: Write your problem statement in one sentence before you write a single solution idea. If you cannot describe the problem clearly, you do not understand it well enough yet.
Stage 2: Ideation and exploring multiple solution options
Once you have a clear problem, the temptation is to latch onto the first solution that comes to mind. Resist that. Inventors who generate multiple ideas — at least 4 to 6 distinct concepts before selecting one — consistently produce more marketable inventions than those who commit early.
Structured ideation is not about waiting for inspiration. It is a discipline you practice. Disciplined creative routines — scheduled invention sessions, deliberate fluency exercises, and constraints-based thinking — generate better ideas than random brainstorming.
A few ideation techniques worth using:
- Noun-verb technique. List every object (noun) in the problem space and every action (verb) a user performs. Combine them in unexpected ways to generate novel solutions.
- Constraint flipping. Take a key limitation and assume it does not exist. What would you build then? Work backward to see if pieces of that solution apply to reality.
- Analogous domains. How did a completely unrelated industry solve a similar problem? Velcro came from studying burrs. Post-it notes came from failed adhesive research.
- Worst idea first. Deliberately generate the worst possible solution. It loosens mental blocks and occasionally reveals something useful hiding in the absurd.
Innovation success depends on combining creative ideation with structured implementation. Generating ideas without a plan to evaluate and execute them wastes the effort. Move through ideation quickly, document everything, and carry at least three options into the next stage.
Pro Tip: Set a timer for 20 minutes and force yourself to write down ten solution ideas, no matter how rough. Quantity trains fluency. Fluency trains quality.
Stage 3: Evaluation, selection, and early documentation
You have a shortlist of promising ideas. Now you need to make a defensible decision about which one to develop, and you need to start protecting it legally before you talk to anyone else about it.

Evaluating your ideas
Use three lenses to assess each concept:
- Market potential. Is there a real, reachable customer segment? Is the market large enough to justify development costs?
- Technical feasibility. Can this actually be built with available materials, technology, and budget? What are the hardest engineering problems?
- Novelty and patentability. Does a prior art search show this already exists in a patent or product? A quick search on the USPTO database or Google Patents takes under an hour and can save you years of wasted effort.
Documentation and patents
Start documenting the moment you have a concept worth developing. Dated sketches, written descriptions, and witness signatures establish legal priority. This is not bureaucratic busywork. It is the foundation of any patent claim.
A provisional patent application gives you a 12-month window to keep developing while holding your early filing date. For startups and solo inventors, that window is genuinely strategic. It lets you refine your invention, test the market, and attract interest before committing to the full cost of a non-provisional patent.
Here is a quick comparison to frame your patent strategy:
| Option | Cost range | Timeline | Best for |
|---|---|---|---|
| Provisional patent application | $150 to $1,500 | Filed in days | Early-stage protection, 12-month window |
| Non-provisional patent application | $5,000 to $15,000 | 2 to 3 years to grant | Full legal protection, licensing |
| No filing | $0 | Immediate | High-risk, not recommended |
Pro Tip: The 12-month non-provisional deadline after filing a provisional application is a hard cutoff with no extensions. Missing it means losing your filing date entirely. Set a calendar alert the day you file.
Stage 4: Prototyping, testing, and iterative refinement
This is where most inventors learn more in two weeks than they did in six months of planning. Physical prototypes expose problems that no amount of thinking will reveal. The key is to build cheaply and build often.
Start with cheap, partial models designed to test one specific assumption at a time. Do not try to build the final product in prototype form. Build the minimum needed to answer the question you are most uncertain about. If you are unsure whether users can operate a control mechanism, build just that mechanism out of cardboard and tape.
The iterative loop in practice
The prototyping process follows a tight cycle: build, test, observe, adjust, repeat. Each pass through the loop should answer one question and raise the next. Here is what that looks like across prototype generations:
| Prototype stage | Primary goal | Common output |
|---|---|---|
| Concept model | Visualize the idea, test core function | Cardboard, foam, 3D prints |
| Functional prototype | Test mechanics and user interaction | Basic working model |
| Refined prototype | Test durability, ergonomics, materials | Near-production version |
| Pre-production sample | Validate manufacturing process | Factory-grade unit |
Virtual simulation tools and CAD software reduce the cost of early testing significantly. Running digital stress tests and fluid dynamics simulations before cutting physical parts can eliminate entire rounds of physical prototyping. Many inventors now use CAD modeling as their first "prototype" pass before touching any material.
Common pitfalls to avoid during this stage:
- Falling in love with version one. Your first prototype will be wrong in ways you cannot predict. Plan for it.
- Skipping user testing. You are not your user. Watch real people use your prototype and stay quiet while they struggle.
- Over-engineering too early. Precision matters later. Right now, speed of learning matters more.
- Ignoring failure data. Every failed test is data. Log every result, even the embarrassing ones.
Pro Tip: Before spending money on a physical prototype, use a CAD or AI-powered visualization tool to model your concept digitally. You will spot structural problems in hours rather than weeks.
Stage 5: Final refinement, scaling, and market launch preparation
Your prototype works. Users respond positively. Now comes the stage most inventors underestimate: the gap between a working prototype and a manufacturable product.
Production design is not the same as prototype design. Materials that work on a handmade model may be unavailable at scale or prohibitively expensive in volume. Tolerances that a skilled maker achieves by hand cannot always be replicated by automated machinery. Every design decision gets reviewed through the lens of cost per unit, consistency at volume, and supplier reliability.
Key activities in this final stage include:
- Design for manufacture review. Work with a manufacturer or engineer to identify components that need redesign for efficient production.
- Cost modeling. Calculate your fully landed cost per unit at different production volumes (100, 1,000, 10,000 units). Gross margin determines viability.
- Patent enforcement planning. A patent only protects you if you are prepared to defend it. Understand what infringement looks like and what your response options are.
- Market entry strategy. Direct-to-consumer, licensing, or distribution partnerships each require different timelines and capital. Decide before you reach launch, not after.
Understanding how this phase connects to broader product development cycles can help you plan resources and avoid late-stage surprises, particularly if your invention has a software or digital component.
My honest take on the invention process
I want to share something that most guides skip over. The hardest part of inventing is not the idea. It is not even the patent. It is what I call the long middle.
The long middle is everything between your initial excitement and your first real product in someone's hands. It is the fifth prototype that still does not work right. It is the prior art search that reveals someone filed something similar in 2019. It is the manufacturer who needs a minimum order of 2,000 units when you only planned for 200.
In my experience, the inventors who succeed are not the ones with the most creative ideas. They are the ones who treat invention as a practice rather than an event. They schedule time to work on it every week. They document obsessively because they know memory is unreliable and patent disputes are unforgiving. They treat every failed test as useful information rather than a sign to quit.
The iterative nature of real invention means you will loop back through earlier stages more than once. That is not failure. That is the process working correctly. The inventors who panic and abandon projects at the first loop-back are the ones who lose. The ones who stay and refine are the ones who ship.
One more thing: do not underestimate how much early documentation matters. I have seen inventors lose patent disputes and licensing opportunities because they could not prove when they developed a specific feature. A dated notebook page can be worth more than any patent attorney's retainer.
— Hua
How Inventifystudios can move you forward
You now have the full picture of what invention development actually looks like. The next challenge is executing it without spending a fortune or wasting months on avoidable mistakes.
Inventifystudios is built specifically for inventors at every stage of this process. Whether you are defining a problem, generating ideas, or preparing for a provisional patent, the platform gives you AI-powered tools to move faster and smarter. You can generate a 3D prototype in minutes, run a patentability analysis before committing to a full filing, and receive tailored insights for drafting your provisional patent narrative. All of it is available without the $5,000 to $15,000 cost of traditional consulting routes.
If you are ready to take your concept through the development stages with real tools behind you, start at Inventifystudios and explore what is possible. The process is clearer than you think. The tools are ready when you are.
For deeper guidance on transforming a specific technology idea into a market-ready product, the invention detail resources walk you through concept validation, prototype planning, and patent preparation in one place.
FAQ
What are the main stages of invention development?
The core stages are problem definition, ideation, evaluation and documentation, prototyping and testing, and final refinement for market launch. Each stage feeds into the next, and real invention often loops back through earlier stages multiple times.
How long does the invention development process take?
Timelines vary widely, but patent grant alone typically takes 2 to 3 years after filing a non-provisional application. Physical product development from concept to market can take anywhere from 12 months to several years depending on complexity.
When should I file a provisional patent application?
File a provisional patent application as soon as you have a documented, workable concept worth protecting. It secures your filing date and gives you a 12-month window to refine the invention before committing to a full non-provisional application.
Why do inventors generate multiple ideas instead of developing their first concept?
Research shows that inventors who generate at least 4 to 6 distinct ideas before selecting one produce significantly better and more marketable inventions. The first idea is rarely the best one. Volume of ideas improves the quality of the final selection.
What is the biggest mistake inventors make during prototyping?
The most common mistake is trying to build a near-final product as the first prototype. Early prototypes should be cheap, partial, and focused on testing one specific assumption. Expensive first prototypes waste resources and slow down learning.