

Prototypes reduce development fees by buying decision-making information early, before expensive tooling, engineering hours, and supplier contracts lock in the cost of a mistake. Every dollar spent testing a prototype can save a multiple in downstream rework costs. The tactics that make this work:
- Define a single, testable hypothesis for each build
- Match fidelity to the question, not to your ambition
- Separate appearance prototypes from functional ones
- Run simulation or virtual tests before fabricating physical parts
- Engage manufacturers before you finalize geometry
- Clarify MVP scope so you only build what the launch decision requires
- Set objective, measurable success criteria before you start
- Substitute off-the-shelf modules for custom parts wherever possible
- Budget a substantial contingency and plan several iterative sprints
That checklist is the whole playbook. The sections below give you the reasoning, the cost numbers, and the templates to apply each tactic.
Table of Contents
- How does defining a hypothesis reduce prototype costs?
- What fidelity level should your prototype actually be?
- Why you should separate looks-like from works-like prototypes
- Can simulation replace physical prototypes to save money?
- How early manufacturer input prevents expensive redesigns
- What is the minimum viable prototype for a launch decision?
- How do you set success criteria that protect your budget?
- Using off-the-shelf components to cut prototype build costs
- How to build contingency and cost ceilings into your prototype plan
- What do prototype tiers actually cost, and how long do they take?
- Research confirms: prototyping buys information that prevents expensive rework
- Your prototyping playbook: a 6–12 week checklist to reduce fees
- Key Takeaways
- The mistake most founders make with prototypes
- Inventifystudios cuts your prototype fees from the first sprint
- Useful sources and further reading
How does defining a hypothesis reduce prototype costs?
Every prototype should answer one question. Not "does this product work?" but something precise: "Can a user complete checkout in under 45 seconds?" or "Does the dielectric hub survive 10,000 cycles at the target stress load?" That specificity is what controls scope, and scope controls cost.
A hypothesis frames the decision the prototype must enable: viability, usability, manufacturability, cost target, or performance. When the question is narrow, the build is narrow. A broad, undefined goal produces a prototype that tries to prove everything at once, which means higher fidelity, more parts, more time, and more fees.
Pro Tip: Rank your hypotheses by multiplying business impact by uncertainty. The highest-scoring combination deserves the first sprint's budget. Low-impact or low-uncertainty questions can wait.
Useful hypothesis categories to test one at a time:
- Viability: Can this mechanism physically do what we claim?
- Usability: Can target users complete the core task without guidance?
- Manufacturability: Can this geometry be produced at the target cost?
- Performance: Does the design meet the stress, thermal, or cycle spec?
- Cost target: Does the bill of materials land within the budget ceiling?
Treating prototyping as an information purchase and budgeting for 3–5 iterative sprints gives you a structured way to answer these questions without a single runaway build.
What fidelity level should your prototype actually be?
Fidelity is the biggest lever on per-build cost. Overbuilding a prototype to production quality when you only need to test a form factor wastes money. The rule is simple: use the cheapest method that honestly answers the hypothesis.

| Fidelity tier | What it validates | Typical per-piece cost | Best timing |
|---|---|---|---|
| Concept mockup (foam, paper, FDM) | Form, scale, layout, basic ergonomics | $5–$45 | Ideation through early design |
| Functional prototype (SLA, SLS, MJF) | Fit, assembly, basic mechanical function | $50–$280 | Mid-design, before DFM review |
| Engineering prototype (CNC, vacuum casting) | Stress, tolerance, material performance | $65–$280+ | Late design, pre-tooling validation |
| Pre-production prototype (pilot tooling) | Full production intent, regulatory prep | $500–$2,000 | Final validation before launch |
Per-piece process selection dominates cost more than any other single variable. Batching parts in one build run also cuts per-piece price significantly.
Cost-saving fidelity decisions to apply now:
- Use FDM 3D printing for form-fit checks at $5–$45 per piece
- Step up to SLA or SLS only when surface finish or mechanical fit matters
- Reserve CNC machining for late-stage stress testing at $65–$280 per piece
- Avoid pilot tooling until the design has passed at least two functional prototype rounds
- Batch multiple geometry variants into a single print run to reduce per-piece fees
Understanding the full product prototype stages helps you plan which fidelity tier belongs at each phase.
Why you should separate looks-like from works-like prototypes
Mixing appearance validation with functional validation in one build is one of the most common ways teams inflate prototype costs. An appearance prototype answers: "Does this look right?" A functional prototype answers: "Does this work correctly?" Asking both questions from one build forces you to use expensive materials and tight tolerances before you know whether the core mechanism is even viable.
When an appearance prototype is sufficient:
- Investor or marketing demos where visual form matters
- Early user feedback on size, shape, and color
- Packaging and retail display fit checks
When a functional prototype is required:
- Stress, thermal, or cycle-life testing
- Electronics integration and signal validation
- Regulatory or safety certification prep
A marketing demo built to functional-prototype spec can cost three to five times more than a simple appearance model. That gap is pure waste if the goal is only to show a concept to investors. Stage your builds: start with a low-cost appearance model, then commission a targeted functional build only for the riskiest technical elements.
Practical staging approach:
- Build a foam or FDM appearance model first for stakeholder alignment
- Identify the two or three highest-risk functional elements
- Commission a focused functional prototype for those elements only
- Combine appearance and function only in the pre-production round
Can simulation replace physical prototypes to save money?
Virtual testing is not a replacement for physical prototypes, but it is a cost-effective first filter. Running a finite element analysis (FEA) on a high-stress feature before printing anything can catch a geometry flaw that would have required two or three physical iterations to find. Digital twins and virtual simulation can prevent at least a third of physical budget overruns tied to trial-and-error fabrication.
Common simulation types worth investing in early:
- FEA: Structural stress and deflection on load-bearing features
- CFD: Airflow, pressure drop, and thermal management
- Thermal simulation: Heat dissipation and component temperature mapping
- Tolerance stack analysis: Fit and assembly clearance across multiple parts
- Digital twins: System-level behavior modeling before any hardware exists
- UX clickthroughs: Interactive wireframes for user-flow validation before UI development
The cost trade-off is real. Simulation software licenses and engineer time are not free. The question is whether the simulation cost is less than the physical iteration it replaces. For components where a single rework cycle costs thousands of dollars, the answer is almost always yes.
Pro Tip: Prioritize simulation for the features where physical rework is most expensive: complex castings, injection-molded geometry, or any part that requires re-tooling to change. A $500 FEA run that prevents one tooling revision pays for itself immediately.
An agile development workflow applies the same logic to software-adjacent products: test assumptions digitally first, then build only what the test validates.
How early manufacturer input prevents expensive redesigns
Most founders wait until they have a near-production prototype before talking to a manufacturer. That timing is expensive. Manufacturer input at the concept or early functional stage changes geometry, material choices, and tolerances before any tooling costs are committed.
What to ask manufacturers before you finalize your design:
- What are your minimum order quantities and tooling cost brackets?
- Which materials and processes do you prefer for this part geometry?
- What tolerances can you hold reliably at production volume?
- What assembly methods reduce labor cost at scale?
- Are there geometry features that will drive up per-unit cost?
Pro Tip: Treat a manufacturer feasibility check as a formal milestone in your prototype plan, not an afterthought. Schedule it after your first functional prototype and before you commit to a second iteration. The feedback often changes the design enough to skip an entire build round.
Design for manufacturing (DFM) review at the prototype stage also affects fidelity choices. If a manufacturer flags that a wall thickness is too thin for injection molding, you can correct it in a $30 FDM print rather than in a $2,000 CNC part. Early DFM input saves both prototype fees and production tooling costs.

What is the minimum viable prototype for a launch decision?
The MVP and the minimum viable prototype are not the same thing. The MVP is the product you ship to early customers. The minimum viable prototype is the smallest build that gives you the information needed to decide whether to ship at all.
Questions that define a minimum viable prototype:
- What must be tested before we can commit to production tooling?
- What technical risks, if unresolved, would kill the product?
- What user behaviors must we observe before locking the design?
- What can be deferred to a post-launch iteration without affecting the launch decision?
A simple sprint structure works well here. Sprint 1 tests the core mechanism. Sprint 2 validates fit and user interaction. Sprint 3 confirms manufacturability. A go/no-go decision gate at the end of each sprint keeps the budget from drifting. A prototype often costs about 20% of the cost of building the full product and usually takes 4–8 weeks, so a plan of multiple sprints is usually achievable within a few months at a reduced development spend.
Prototypes also create investor leverage. A working model that validates core assumptions strengthens a funding pitch and can generate pre-orders that offset prototype costs directly.
How do you set success criteria that protect your budget?
Open-ended iteration is where prototype budgets collapse. Without a defined pass threshold, every build leads to "one more tweak," and fees compound. Objective success criteria stop that cycle before it starts.
Each prototype sprint should have a data table like this:
| Hypothesis | Metric | Pass threshold | Test method | Sample size | Estimated cost per test |
|---|---|---|---|---|---|
| User completes checkout unaided | Task completion time | Under 45 seconds | Moderated usability test | 5 participants | $65–$280 |
| Hub survives rated load | Cycle count at X stress | 10,000 cycles, no failure | Mechanical fatigue rig | 3 samples | — |
| Assembly fits within enclosure | Dimensional tolerance | ±1 mm on all mating faces | CMM or caliper check | 5 samples | $5–$45 |
| Thermal dissipation meets spec | Component temperature | Thermal spec compliance | Thermocouple test | 2 samples | $30 |
When a prototype hits the pass threshold, you move to the next sprint. When it fails, you document the failure mode, adjust the design, and re-test. When it fails repeatedly without a clear fix, the budget trigger fires and you reassess the concept.
Recording results in a shared document also reduces written documentation overhead, since design decisions are captured in the prototype record rather than in long specification documents.
Using off-the-shelf components to cut prototype build costs
Custom parts are expensive to design, source, and iterate. Off-the-shelf modules let you test a subsystem's behavior without committing to custom geometry. Lock custom parts only after module-level validation confirms the subsystem works.
Common off-the-shelf options to consider:
- Electronic modules: Arduino, Raspberry Pi, and breakout boards for sensor and control validation
- Actuators: Standard servo motors, stepper drivers, and linear actuators for motion testing
- Sensors: Pre-calibrated temperature, pressure, proximity, and IMU modules
- Enclosure blanks: Standard extruded aluminum profiles and off-the-shelf enclosures for early form-fit checks
- Fasteners and hardware: Standard metric or imperial hardware instead of custom fasteners until late-stage
One startup reduced outsourced prototype costs from $800 to under $10 per unit by combining in-house FDM printing with off-the-shelf electronic modules. That kind of cost compression accelerates iteration cycles and extends the prototyping budget further.
Supply-chain notes that affect budgeting: standard modules ship in days; custom PCBs and machined parts can take 2–6 weeks. Factor lead times into your sprint calendar so a delayed part does not stall the entire iteration cycle. For low-cost prototyping tools, open-source hardware platforms give you a strong starting point.
How to build contingency and cost ceilings into your prototype plan
Running out of prototyping budget mid-iteration is one of the most common and most avoidable failures in product development. The fix is to treat contingency as a line item, not an afterthought.
Recommended contingency range: 20–40% of the prototype line item, scaled to uncertainty. A well-defined mechanism with known materials sits at the low end. A novel mechanism with unproven materials needs the full 40%.
Tactical actions to protect the budget:
- Set a stop-loss trigger: if a sprint exceeds budget by more than 20%, pause and reassess before continuing
- Maintain a prioritized feature backlog so you can descope the next sprint without losing the critical test
- Batch order parts across multiple sprints to reduce per-piece cost
- Use funding milestones or pre-orders to expand the prototype run without increasing founder cash outlay
- Plan NRE costs (tooling, certification, regulatory testing) as separate line items, not as part of the prototype budget
Investing 10–20% of the total product budget in prototyping is consistently cheaper than paying for corrections after development, which can run 10–50x more expensive. The hardware budget planning principle is the same: budget explicitly for 3–5 prototype iterations and NRE to avoid a production cliff.
For a detailed breakdown of how to allocate across phases, the invention development budget planning guide covers contingency structures and milestone-based spending.
What do prototype tiers actually cost, and how long do they take?
| Prototype tier | Purpose | Typical timeline | Ballpark cost range |
|---|---|---|---|
| Concept mockup | Form, scale, layout | 1–2 weeks | $5–$45 |
| Form-fit prototype | Assembly, ergonomics, basic fit | 2–4 weeks | $50–$280 |
| Functional prototype | Mechanical, electrical, or UX validation | 4–8 weeks | — |
| Pre-production prototype | Production-intent validation, regulatory prep | 2–6 weeks | — |
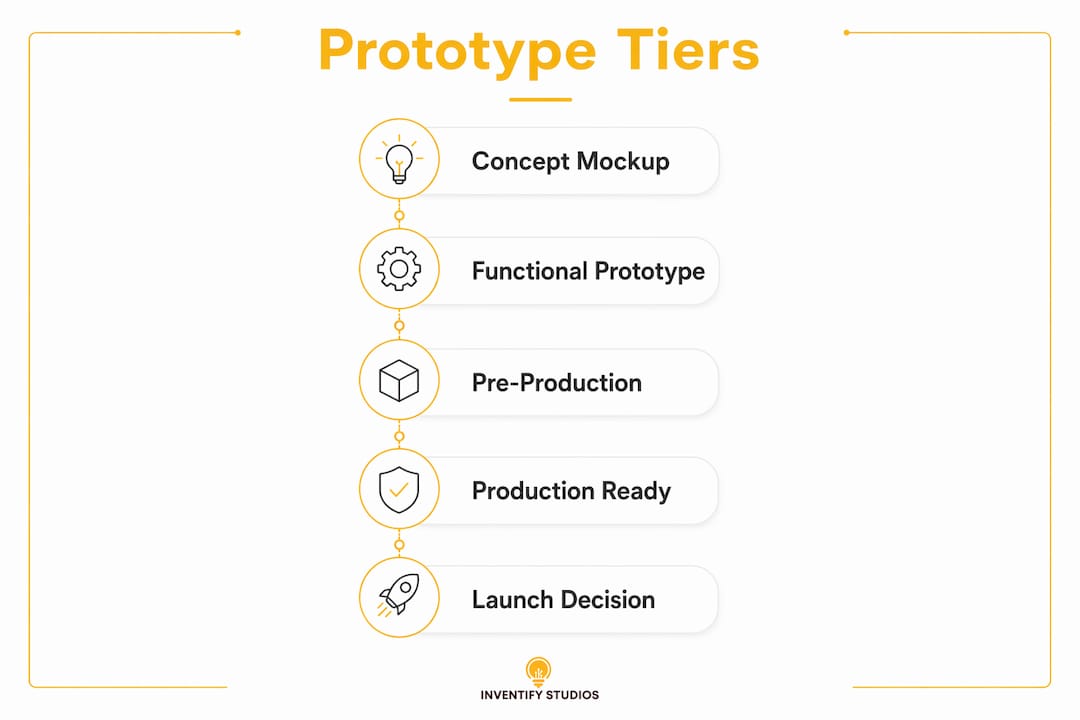
Drivers that push a project from one cost band to the next: tighter tolerances, exotic materials, higher part counts, more test iterations, and third-party certification requirements. A simple consumer product with standard tolerances stays at the low end. A medical device or aerospace component with regulatory requirements moves quickly toward the high end.
Batching, in-house printing, and supplier selection all shift these numbers. In-house FDM printing collapses concept mockup costs to near zero for simple geometries. Choosing a domestic rapid-prototyping supplier over an overseas one adds cost but cuts lead time by 2–4 weeks, which can be worth it when a sprint deadline is tight. The invention development stages framework maps these tiers to the broader product development timeline.
Research confirms: prototyping buys information that prevents expensive rework
The financial case for prototyping is well-documented. Every dollar spent on prototype testing can save $10–$100 in development costs, and one cited scenario shows three weeks of prototype testing preventing six months of redevelopment worth hundreds of thousands of dollars.
Statistic: Practitioners recommend allocating 10–20% of the product budget to prototyping. Corrections made after development can cost 10–50x more than the same fix made during the prototype phase.
Digital twins amplify this further. Virtual testing can prevent at least a third of physical budget overruns tied to trial-and-error fabrication. For product teams running multiple physical iterations, that fraction represents a significant reduction in total prototype spend.
Pro Tip: When deciding between a digital simulation and a quick physical prototype, ask which one gives you the answer faster at lower cost. For geometry-driven failures (stress, fit, clearance), simulation usually wins. For user-behavior failures (interaction, ergonomics, confusion), a physical or interactive prototype wins every time.
The role of prototypes in product development goes beyond cost control. A working prototype also strengthens investor pitches and supports provisional patent filings by demonstrating that the concept has been reduced to practice. An agile web app design workflow applies the same principle to digital products, where rapid iteration cycles have shown cost reductions of up to 60%.
Your prototyping playbook: a 6–12 week checklist to reduce fees
The minimal playbook: define one hypothesis per sprint, choose the lowest fidelity that answers it, simulate before fabricating where the simulation cost is less than one physical iteration, engage your manufacturer before sprint 3, set a measurable pass threshold, and batch parts wherever possible.
Weeks 1–2: Define and plan
- Write one hypothesis statement per planned sprint
- Rank hypotheses by impact × uncertainty
- Select fidelity tier for sprint 1
- Identify off-the-shelf modules that can substitute for custom parts
- Set pass/fail thresholds and document them
Weeks 3–6: Build and test
- Run simulation or virtual test before fabricating sprint 1 parts
- Build sprint 1 prototype at the lowest viable fidelity
- Test against the defined pass threshold
- Document results and failure modes
- Adjust design; batch sprint 2 parts with any sprint 1 reorders
Weeks 7–10: Manufacturer engagement and functional validation
- Share sprint 2 prototype with at least one manufacturer for DFM feedback
- Incorporate DFM changes before sprint 3 build
- Run functional prototype at appropriate fidelity
- Confirm manufacturability and cost target
Weeks 11–12: Decision gate
- Review all sprint results against success criteria
- Make go/no-go decision on production tooling
- Document open risks and defer non-critical features to post-launch
- Confirm NRE budget and tooling timeline
Key Takeaways
Prototypes reduce development fees by buying information early, when changes cost a fraction of what they would after tooling, certification, or supplier contracts are in place.
| Point | Details |
|---|---|
| Prototype as information purchase | Budget for 3–5 iterative sprints; each sprint answers one hypothesis and controls scope. |
| Match fidelity to the question | Use FDM at $5–$45/piece for early form checks; reserve CNC at $65–$280/piece for late-stage stress tests. |
| Simulate before fabricating | Virtual testing can prevent at least a third of physical budget overruns tied to trial-and-error fabrication. |
| Budget 10–20% for prototyping | Corrections after development can cost 10–50x more than the same fix made during the prototype phase. |
| Inventifystudios accelerates iteration | The AI-powered platform generates 3D prototypes and runs manufacturability checks, reducing external vendor fees from the first sprint. |
The mistake most founders make with prototypes
The conventional wisdom says "prototype early and often." That advice is correct but incomplete. The founders who still overspend on prototyping are not skipping prototypes. They are building the wrong kind.
The most common pattern: a founder commissions a high-fidelity, appearance-perfect prototype before the core mechanism has been validated at all. The prototype looks great in a pitch deck. It proves nothing about whether the product can be manufactured at the target cost, survive its rated cycles, or be used by a real person without confusion. Then the functional issues surface in sprint 3 or 4, after significant money has been spent on a beautiful shell.
The second pattern is the opposite: a founder skips manufacturer input entirely and builds five functional prototypes that all share the same DFM flaw. A single conversation with a manufacturer after sprint 1 would have caught it.
What actually works is sequencing. Appearance first, at the lowest possible cost. Functional validation of the riskiest elements only, at the minimum fidelity that answers the question. Manufacturer input before sprint 3. And a hard budget trigger that forces a decision rather than another iteration.
Prototypes are not a phase you complete. They are a series of deliberate bets on specific questions. The founders who control costs are the ones who know exactly what question each build is answering, and who stop building the moment the question is answered.
Inventifystudios cuts your prototype fees from the first sprint
Skip the $800-per-prototype vendor cycle. Inventifystudios gives founders AI-generated 3D prototypes in minutes, built-in manufacturability checks, and patent-ready documentation, all in one platform at a fraction of traditional consulting costs.
You get a visual prototype you can test, share with manufacturers, and use in investor pitches without commissioning an external design firm. The platform's prior art search and provisional patent drafting tools mean your prototype work feeds directly into IP protection, so you are not paying separately for documentation that should already exist. Whether you are in sprint 1 or sprint 4, Inventifystudios keeps iteration costs low and decisions fast.
Start your first prototype and see how much of your development budget you can protect before a single physical part is built.
Useful sources and further reading
The claims in this article draw on the following sources. Each entry notes which sections it informed.
Research and cost data:
- How Prototyping Prevents Costly Product Development Mistakes — $10–$100 ROI per dollar spent; used in the research insight and opening sections
- How to cost prototype and MVP development: a sprint-by-sprint budget — iterative sprint budgeting; used in the hypothesis and contingency sections
- How to quickly cut prototype design costs in 2026 — digital twins and simulation savings; used in the simulation and research insight sections
- Prototyping vs direct development: managing budget risk — 10–20% budget allocation and 10–50x rework cost multiplier; used in the contingency and key takeaways sections
- Rapid prototyping cost: pricing guide & cost factors — process selection and batching; used in the fidelity and timeline sections
- 3D printing prototypes to save money and minimize risk — in-house printing cost reduction from $800 to under $10; used in the off-the-shelf components section
- Prototypes vs building: save 80% on validation — prototype at ~20% of build cost, 4–8 week timeline; used in the MVP section
- Rapid prototyping service for startups: how to save budget without sacrificing quality — per-piece cost examples for FDM vs CNC; used in the fidelity and components sections
- Deeptech hardware budget planning — NRE planning and production cliff risk; used in the contingency section
- Early Prototyping: How It Saves Product Budgets — early-stage prototyping cost framing and investor signaling
Inventifystudios resources for deeper exploration:
- The Role of Prototype in Product Development: 2026 Guide — broader context on prototype strategy and development risk
- Invention Development Budget Planning: A 2026 Guide — contingency structures and milestone-based spending
- Invention Prototype Patent Connection: 2026 Guide — how prototype artifacts support provisional patent filings
- DIY Invention Development Steps: Turn Ideas into Products — founder-focused steps for low-budget prototyping